Okay, so I decided to get my hands dirty with my Kawasaki 300’s engine. I’m no professional mechanic, but I like tinkering and figuring things out. I’ve been feeling like the bike’s lost a little pep, so I thought, “Why not dive in and see what’s up?”
First things first, I gathered all my tools. Wrenches, sockets, screwdrivers, the whole nine yards. I also made sure I had a clean workspace. You don’t want to be dropping bolts into a pile of dirt and grime. I watched a few videos beforehand, just to get a general idea of the layout and what I might be getting myself into.
Getting Started
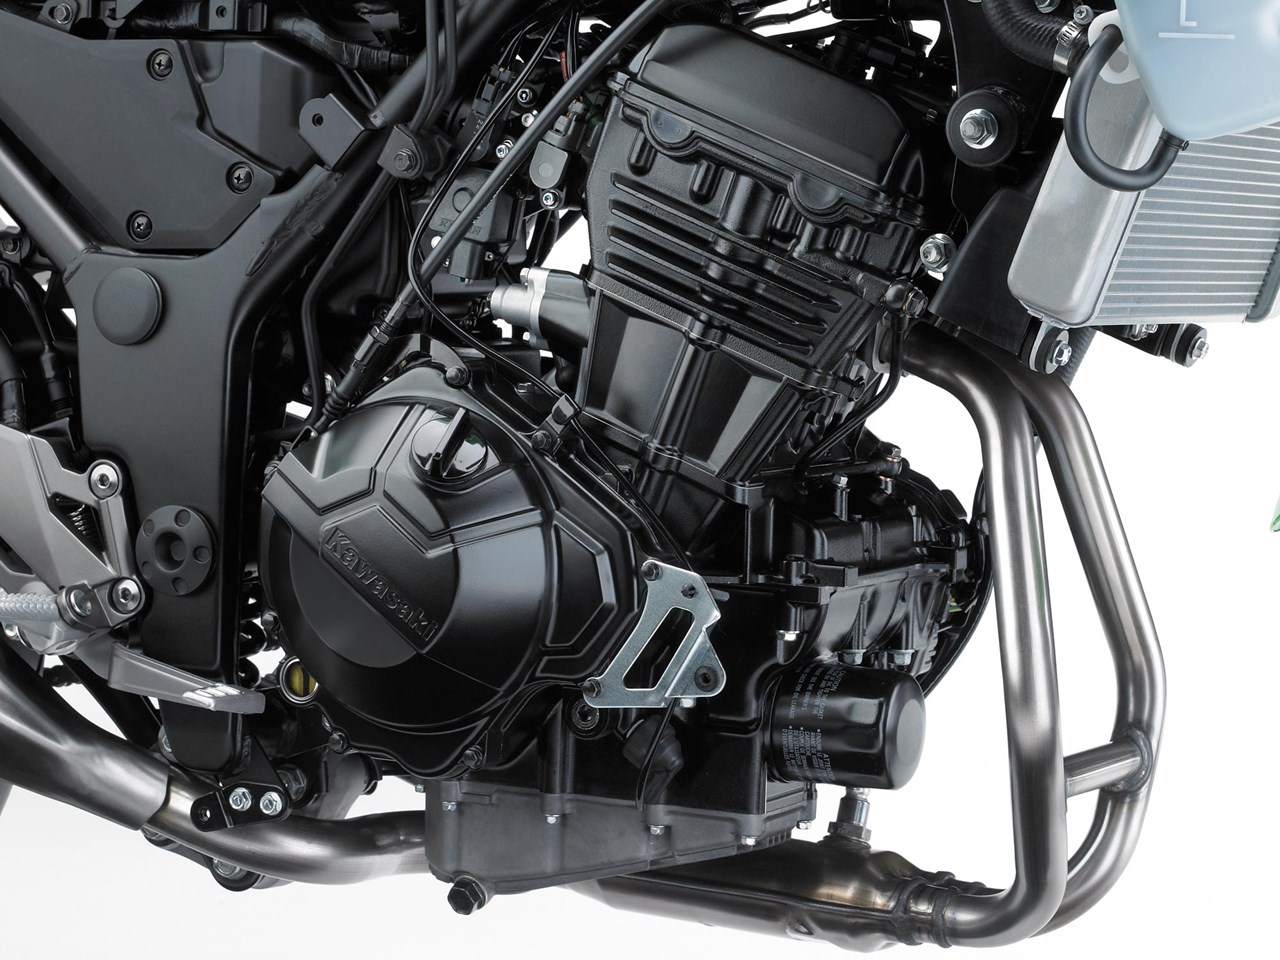
I started by removing the fairings. This was pretty straightforward, just a bunch of bolts and clips. It was kind of like unwrapping a present, revealing the engine underneath. Once the fairings were off, I could actually see the engine in all its glory.
- Took off the side fairings.
- Removed the lower fairing.
- Unplugged a few connectors that were in the way.
Next, I started with the basics. I checked the spark plugs. They were a little dark, so I figured I’d replace them. A clean spark plug can make a surprising difference.
Diving Deeper
After the spark plugs, I decided to take a look at the air filter. It was pretty filthy, clogged with dust and who-knows-what-else. No wonder the bike felt a bit sluggish! I swapped it out for a brand new one. Easy peasy.
I wanted to go a bit further, so I carefully removed the fuel tank. This gave me better access to the throttle bodies. I’d heard these can get gummed up, so I wanted to inspect them. They weren’t too bad, but I gave them a good cleaning anyway, just to be sure.

- Sprayed some carb cleaner.
- Used a soft brush to get rid of any gunk.
- Made sure everything was dry before putting it back.
Putting It All Back Together
Once I was satisfied with the cleaning, it was time to reassemble everything. This was basically the reverse of taking it apart. I made sure to tighten all the bolts properly and double-check all the connections. I put tank back on, then those fairings I took off first. Then the connectors I unplugged.
Finally, I started the engine. It fired right up, and it sounded smoother than before. I took it for a short ride, and it definitely felt more responsive. Success!
It wasn’t a major overhaul, but I learned a lot about my bike’s engine. Plus, I saved some money by doing the work myself. I would say all in all it was a great experience.