Man, Trackmaster train sets look awesome in commercials, but figuring out that first setup had me sweating. Let me walk you through exactly what I did today, warts and all.
Unboxing Chaos
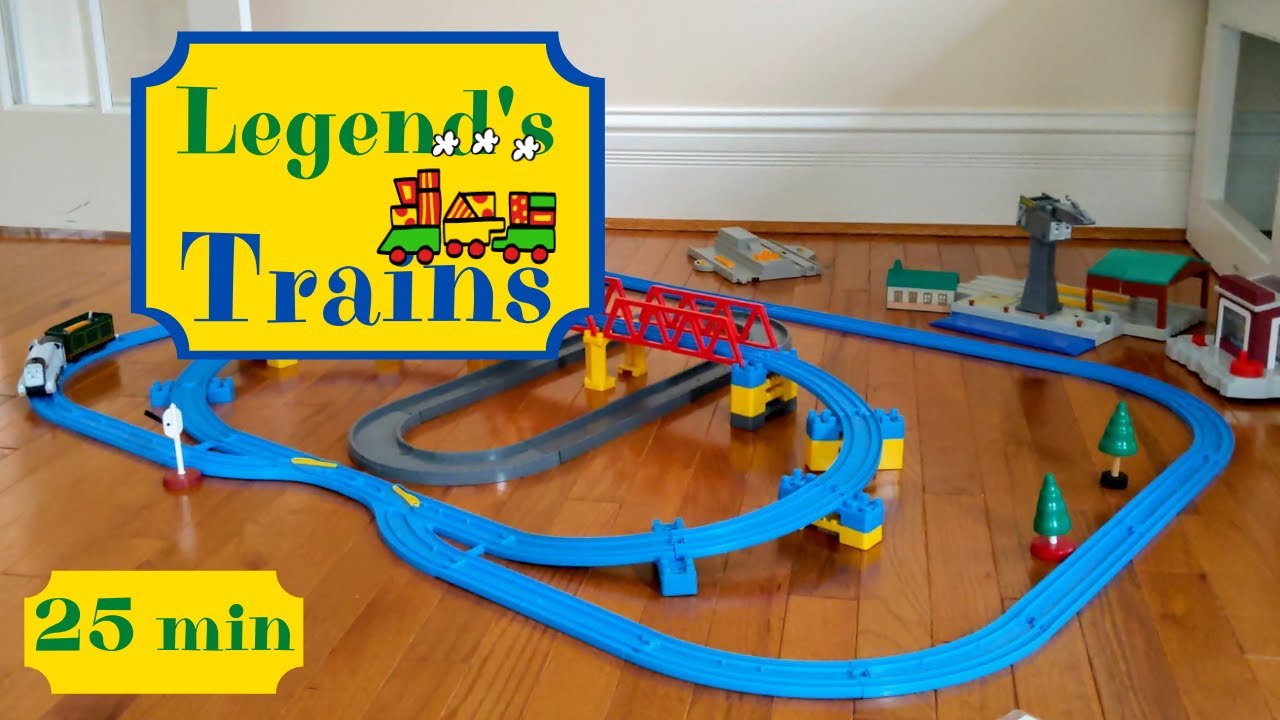
Ripped open the box like a kid on Christmas morning. Pieces everywhere. Straight tracks, bendy tracks, bridges, weird connectors – it looked like a colorful plastic explosion on my living room floor. Seriously overwhelming.
Getting Hands On
I dumped all the track pieces into a big pile. Just dug in, feeling kinda clueless at first. Noticed most pieces have these bumps on one side and matching holes on the other. Grabbed two straight ones and tried pushing the bumpy end of one into the hole-y end of another. Felt a satisfying little CLICK. Okay, cool! That felt solid. So that’s how these bad boys connect. Keep doing that.
The Hurdles (Real Talk)
Easy? Pfft. Ran into stuff quick:
- Bridges & Ramps: Some track bits look special, with slopes or raised bits. I needed these weird blue connector things that snapped underneath them. Took me forever fiddling to figure out how they clipped on right. Super annoying.
- Tight Corners: Tried bending a track section too sharp to save space. Nope. The train just derailed every single time. Had to unclick a few pieces, space them out more gently. Learned the tracks need smoother curves, less sharp angles. Trains ain’t race cars taking hairpins!
- Power Issues: Got the train engine on the track, hit the power button… nothing. Panic mode. Remembered the manual mentioned batteries. Ripped the bottom off the engine – sure enough, empty. Popped those suckers in. Instant vroom.
Nailing The Basics
After all that trial and error (mostly error), here’s the step-by-step that finally worked for me:
- Plan Your Path: Before clicking anything, just lay pieces roughly on the floor where you want the train to go. Avoid crazy twists!
- Click Together: Start connecting those bumpy ends into holes. Push firm until you hear or feel the snap. Gently test each join by trying to wiggle the tracks apart – shouldn’t come loose.
- Lock It Down: If your track moved when the train ran? Yeah, used those blue plastic track pins. Poked them through the tiny holes near the ends of some pieces. They anchor into your carpet.
- Power Placement: Put the battery-powered engine on the track first. Make sure it’s pointing the way you want to go. Easy to forget!
- Test Drive: Hit the go button, hold your breath, and pray. Fixed the bumps? Smoother? Awesome.
Final Thoughts
Took me longer than I expected, gotta be honest. Those ads make it look instant. But pushing through the clicks, the bends, and the battery scramble? Seeing that little engine finally chug smoothly through my living room layout? Pure gold. Worth the headache to hear that satisfying chugga-chugga-choo-choo. Stick with it, learn from my mistakes, and you’ll be rolling.