Alright, so, lemme tell you about this lilith statue project I tackled. It was a wild ride, lemme tell ya.

Getting Started: The Idea
So, I was browsing around, yeah? And I saw some cool statues, and I was like, “I can totally do that!” Lilith seemed like a cool subject – powerful, kinda dark, you know? Perfect for a statue. First things first, I needed a plan. I started sketching out some ideas, nothing fancy, just trying to get a feel for the pose and overall vibe I was going for.
Gathering Supplies: Time to Shop
Next up, I hit the craft store. I figured polymer clay would be a good start – easy to work with, bakes in the oven, no fuss. Grabbed a bunch of different colors – black, grey, maybe some red for accents. Also snagged some wire for the armature, some tools for sculpting, and a baking sheet. Gotta have the essentials, right?
Building the Armature: Wireframe Fun
The armature was kinda tricky. I used the wire to create a basic skeleton of Lilith’s pose. This is super important because it gives the clay something to hold onto and keeps the statue from collapsing while you’re working on it. I bent the wire into the rough shape of the body, arms, and legs, making sure it was all securely twisted together. It looked kinda like a stick figure at this point, but hey, gotta start somewhere.
Sculpting the Clay: Getting Messy
Okay, now for the fun part – the clay! I started adding the clay onto the armature, bit by bit. I focused on the main forms first – the torso, the limbs. I used my fingers and the sculpting tools to smooth out the clay and shape it into the basic silhouette of Lilith. This took a while, like, a few hours. My hands were cramping up, but I was starting to see it come together.
Adding Details: The Devil’s in the Details
Once I had the basic shape, it was time to add the details. This is where it got really interesting. I sculpted the face, trying to give it that Lilith-esque look – strong, alluring, a little bit dangerous. I added hair, wings (which were a pain to attach, lemme tell ya), and some other details like jewelry and clothing. The smaller the detail, the more fiddly it was, but it was worth it.
Baking the Clay: Fingers Crossed
After I was happy with the sculpting, it was time to bake the clay. I followed the instructions on the clay package – preheated the oven, placed the statue on the baking sheet, and let it bake for the recommended time. I was a little nervous, hoping it wouldn’t crack or melt or something. Luckily, it came out perfectly!
Finishing Touches: Making it Shine
After it cooled, I added some finishing touches. I painted some of the details with acrylic paint to make them pop. I also used a clear coat sealant to protect the clay and give it a nice shine. And that was it! My Lilith statue was finally finished.
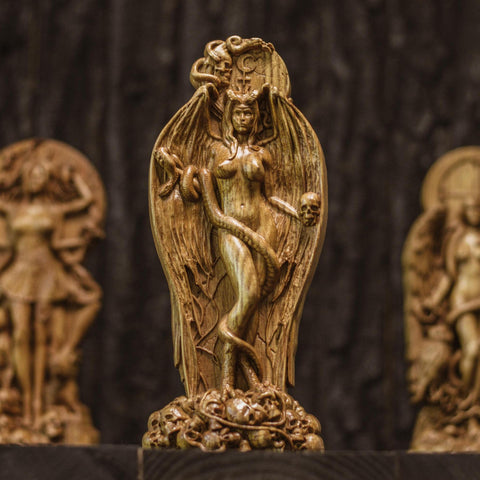
The Final Result: Not Too Shabby
Honestly, I was pretty proud of how it turned out. It wasn’t perfect, of course – there were some imperfections here and there, but hey, that’s part of the charm, right? It was a fun project, and I learned a lot about sculpting along the way. Plus, now I have a cool Lilith statue to display. Maybe I’ll try another one sometime, but for now, I’m happy with this one.