Alright, so this whole ‘ribcage transparent’ thing. Someone asked me how I got that effect done. It wasn’t exactly brain surgery, but man, it felt like it at one point. I was on this small gig, some kind of educational tool, and they needed to show the lungs and heart, you know, without the ribs blocking everything. But they still wanted the ribs to be kinda there.

First thing I thought? “Simple. Just knock back the opacity.” I had this standard 3D model of a ribcage, nothing special. Pulled it into my usual software – you probably know which one I mean.
So, I grabbed the ribcage, dug into the material settings, and just yanked that opacity slider down. And yeah, it looked okay, a bit like a ghost. But then the feedback rolled in: “It’s, like, too much of a ghost. We need it there, but not really there. And can the edges be sharper, even when it’s see-through?” Oh, boy. That’s where the real “fun” started.
My next move was to mess with shaders. I figured, hey, maybe one of those fancy fresnel effects could make the edges pop while the rest stayed transparent. I wasted a good few hours tweaking settings, connecting nodes, all that jazz. Got something that looked pretty slick, like ribs made of glass. But nope. “Not glassy. More like… an X-ray, but not really an X-ray, you get me?” Right. Crystal clear.
This whole song and dance really took me back to this one client I had, years ago. Wanted a logo. “Make it pop!” he kept saying. What in the world does “pop” actually mean in design terms? I swear, I sent him like, twelve different versions. Each one “popped” in its own unique way, or so I thought. In the end, after weeks of back and forth, he picked the very first design I sent, just with a tiny color change. And then he tried to stiff me on half the payment. Some folks, you know? Really makes you wonder why you bother sometimes.
Anyway, back to these darn ribs. I kinda gave up on the super-complex shader route for a bit. Sometimes, the simple way is the best way, isn’t it? I thought, what if I just duplicated the ribcage? Like, have two versions of it. One could be the main transparent part, and the other could be for the outline or a bit more substance.
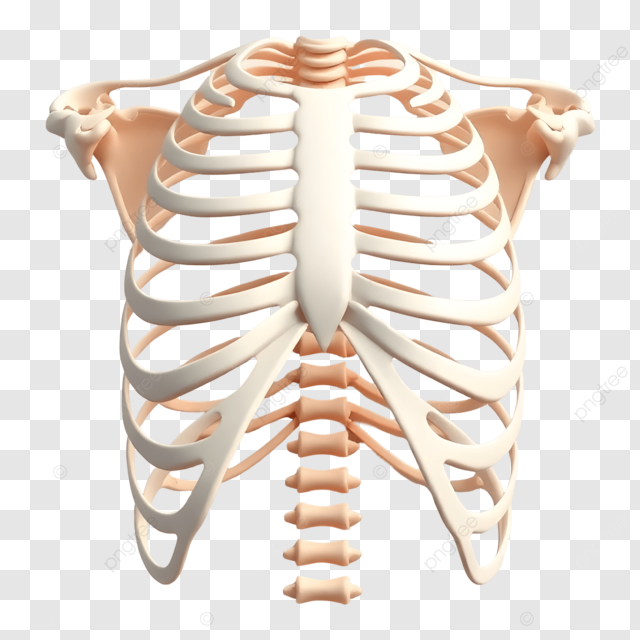
- So, I took the original ribcage model.
- Made a copy. Let’s call them GhostRibs and EdgeRibs.
- For GhostRibs, I dropped the opacity way, way down, maybe to like 20% or something.
- For EdgeRibs, I tried a few things. First, I thought about an outline shader, but that got real messy with different camera angles.
- Then I had this idea: what if EdgeRibs was just a tiny, tiny bit bigger than GhostRibs? Like, scaled up just a hair. And I gave it a material that was still transparent, but a bit brighter, a bit more solid than GhostRibs.
And you know what? That kinda did the trick. It wasn’t perfect, felt a bit like a cheat, but it gave the ribs some shape even when they were mostly see-through. The client was actually happy with it. “Yeah, that’s more like what we were thinking!” they said. Finally! Took long enough.
So, what did I actually get out of this?
Well, mostly that the word “transparent” can mean about a hundred different things to different people. And that the most complicated tools aren’t always your best bet. A bit of clever layering, maybe a little bit of faking it – that’s what got me through this time. It wasn’t the smooth, one-button fix I was hoping for at the start, but hey, the job got done. On to the next puzzle, right? That’s just how it goes, I guess. Always winging it and figuring things out as they come.